Saturday 27 July 2019

Mexican Bean Stew


Another one of those recipes that seems too simple to put on Grubbed Up! since it's so quick and has some cheats, and it's just a staple midweek meal for us (and there's usually some leftovers for a work lunch the next day).  But I've also served this a few times to friends, and they always want to know how it was done.  It's also one of those dishes that can be served in lots of different ways... It's delicious by itself, but also fantastic when served with either rice or Fried Cauliflower Rice.  It works well on a baked potato.  If you can afford the carbs, my favourite way to have it is in wraps with some southern fried chicken goujons, sprinkled with a little grated cheese.

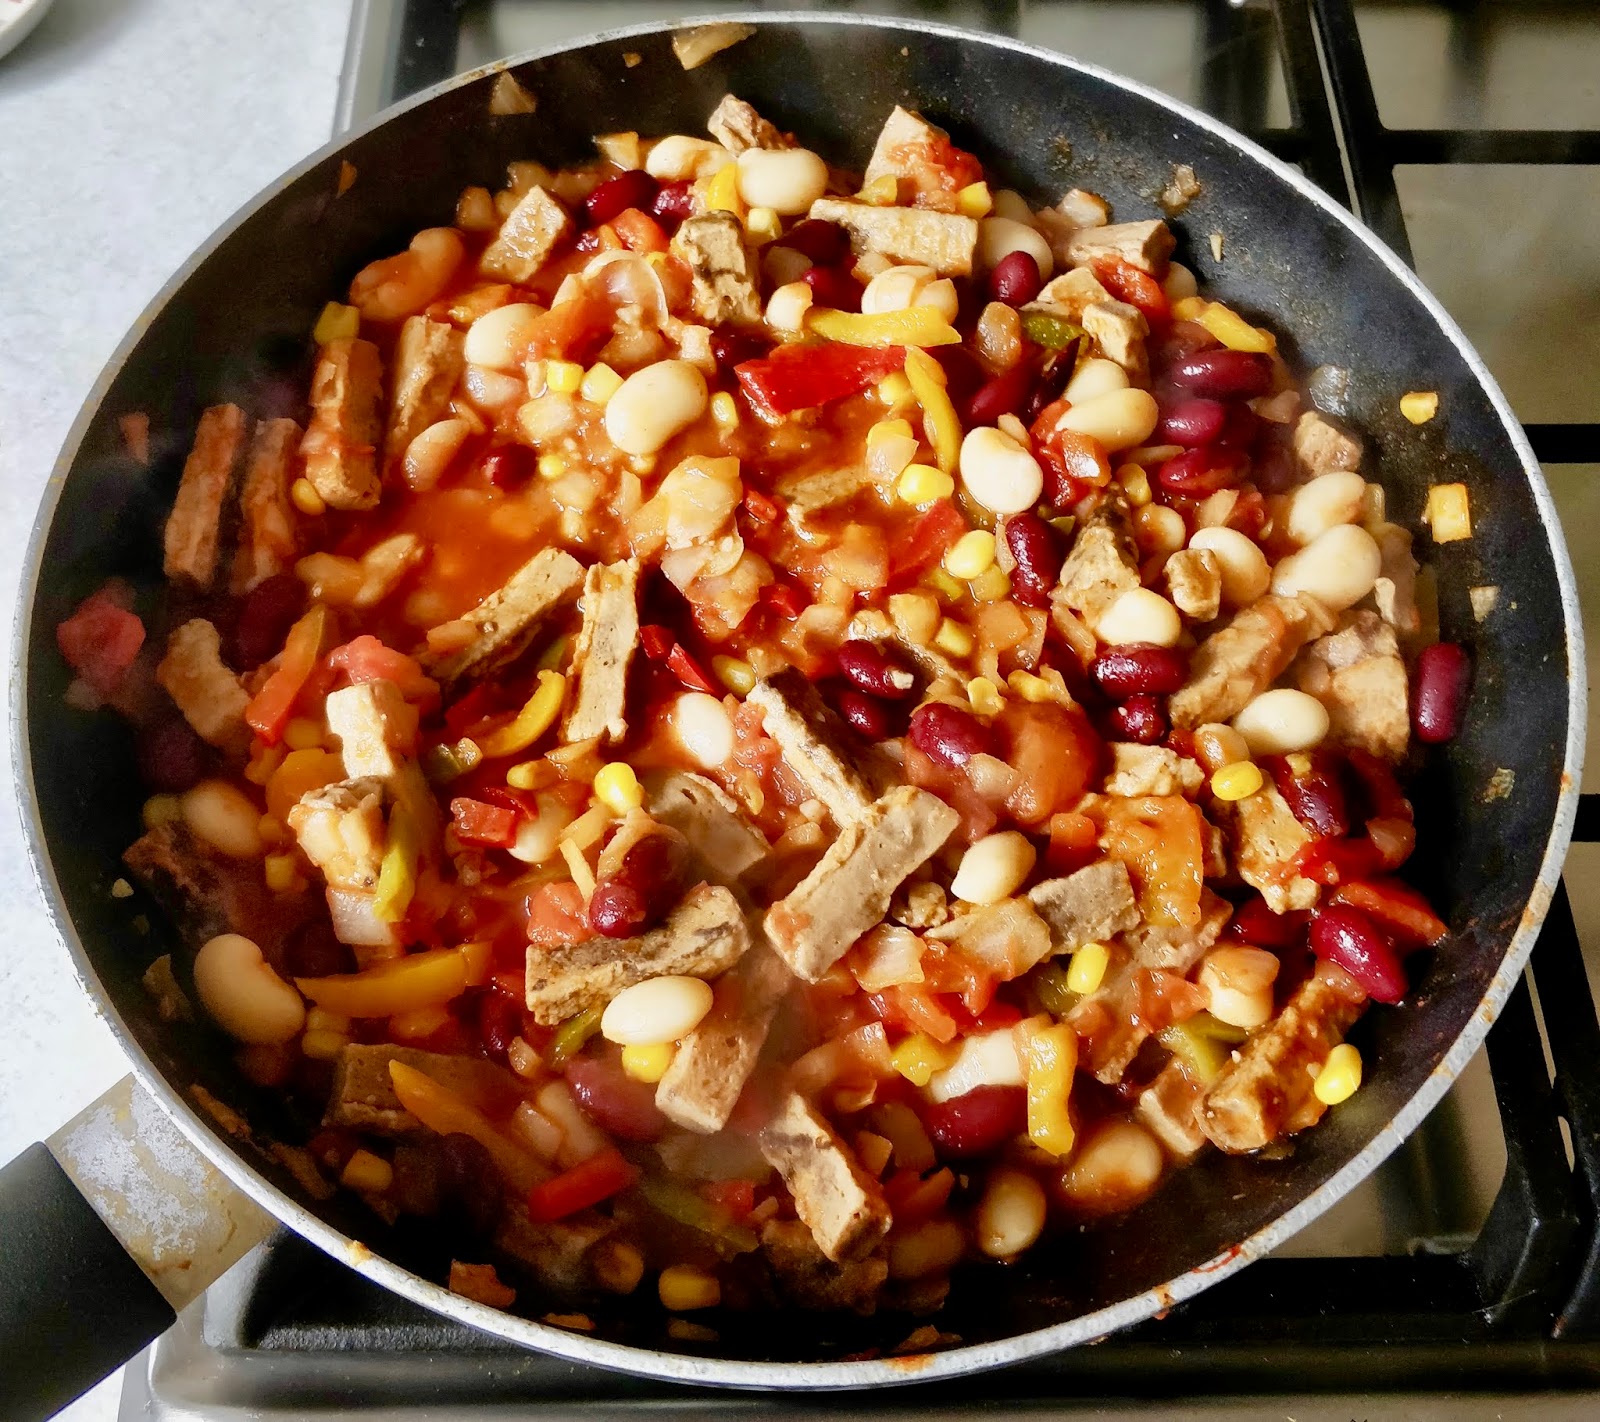
In the picture, I've chosen to add Quorn vegetarian steak strips to the stew.  A lot of people seem to hate Quorn, and I think that's mainly because they've had it badly cooked and ended up with a dry, chewy disappointment.  For me, Quorn only works if you cook it in a sauce, as it's when it soaks up flavours from your cooking liquid that it becomes super tasty.  Try it!  (Or if you really can't bring yourself to use Quorn, add some cooked chicken pieces instead).

Ingredients

250g chopped onions
250g sliced peppers
150g sweetcorn
400g can butter beans
400g can kidney beans
400g can chopped tomatoes
100g tomato puree
1x35g pack fajita seasoning (I use Old El Paso Smoky Barbecue)
Optional ingredients:
1 tbsp sunflower oil
300g pack Quorn chicken style pieces/vegetarian steak strips or 300g cooked chicken pieces

Method

1. Heat the sunflower oil (if using) in a wok or pan on a high heat.  Add the onions, peppers and sweetcorn (I use frozen vegetables for convenience).


2. Cook the vegetables until the onions and peppers are soft and cooked through.


3. Add the beans, tomatoes and tomato puree.  Sprinkle over the fajita seasoning and stir through.  Keep heating this until the sauce starts to bubble, then reduce the heat to a low simmer.


4.  If you are using Quorn or cooked Chicken, add it now.  You can cook these from frozen if required.

5.  Simmer the stew for 10-15 minutes and serve. (If you used frozen Quorn/Chicken, make sure it is fully heated through).  Don't overcook the stew, as the beans may start to break down and mush a bit.

Saturday 20 July 2019

Fried Cauliflower Rice

I was never convinced by the idea of cauliflower 'rice'.  And to be honest, when I first tried it, it was rank, tasteless mush, and a poor replacement for real rice.  But I persevered with it because I was trying to reduce carbs in my diet, and this was an easy alternative. This is my way of improving it, making it something I wanted to eat!  I use frozen peas, sweetcorn and onions for convenience, but you can use pretty much any vegetable you like - mushrooms, peppers, leeks, spring onions - anything you can chop finely.  You can use this in place of any savoury rice dish, like with a curry or chilli.  Or, I like to add some chopped cooked ham, bacon or chicken and have it as a meal in its own right.

Ingredients

1 whole large cauliflower, broken down into florets
100g peas
100g sweetcorn
100g chopped onions
3 tbsp soy sauce
1 tbps sunflower oil (you can make this without oil if you like)
1-2 eggs (optional)
Pinch of black pepper

Method

1. Either grate the raw cauliflower, or pulse the florets in a food processor until it is in small, rice-like pieces.

2. In a wok or frying pan, heat up the sunflower oil (if using) on a high heat.  Add the onions, peas and sweetcorn and cook for around 5 minutes until the onions are soft, stirring occasionally.

3. Add the cauliflower and black pepper to the pan, then pour over the soy sauce and stir until the soy sauce has coloured all the cauliflower evenly (it will be a light brown colour), and the vegetables are evenly spread.

4.  Cook for a further 5-10 minutes, stirring frequently, until the cauliflower is cooked.  Don't cook for too long or the cauliflower will go a bit mushy, which while it tastes OK, isn't the texture of fried rice that we're looking for.

5.  If you are using eggs, beat them first, then drizzle over the 'rice' just before the end of cooking.  Stir the egg through quickly, and they should form tiny pieces of cooked omelette, similar in size to sweetcorn kernels.  The eggs only take a very short time to cook in these small chunks - no more than a minute.

Saturday 13 July 2019

Cabbage and Bacon (or Beans)


I hesitated to even put this on Grubbed Up! because it's just too simple, and honestly, it doesn't look like it's anything special.  But then I realised that it's too delicious not to share, and it's a big portion, filling meal for two that's not too unhealthy!  It's funny, because as a child, you couldn't have paid me to eat cabbage, but now it's one of my favourite vegetables.  Using pre-prepared and frozen vegetables makes this an easy midweek dinner.  And don't be snobby about frozen or canned vegetables, they still count for your 5 a day!

If you want to make this vegetarian, it's also delicious using a can of butter beans instead of the bacon.

Ingredients
600g Baby New Potatoes (or you could use a large can of potatoes)
300g Chopped Onions (I use frozen onions, because of my laziness!)
300g Sweetcorn
8-10 rashers of bacon
Oil for frying.
Black Pepper (optional)
Butter or Low Fat Spread (optional)
HP Brown Sauce (optional)
300g Chopped Cabbage - Tesco do a pack of prepared cabbage and leek that I love for this!


Method

1. Pre-heat the oven to 180ºC.  Place the potatoes on a baking tray and stab each one with a fork.  Cook in the oven for 1 hour.


2. Turn the oven up to 220ºC.  Place the bacon on a baking tray and put into the oven with the potatoes.  Depending on how you like your bacon, it will take around 10-20 minutes to cook.  (I like the bacon snappable - but most of you will think that's massively overdone!).  Make sure you turn it over halfway through cooking or it will stick to the tray.


3. While the bacon is cooking, place a wok or pan on a high heat and get it nice and hot (You really need very little oil).  Add the onions and cook for 5 minutes until they are soft.


4. Add the sweetcorn to the wok and cook for a 2-3 more minutes. (Frozen sweetcorn takes a minute or two longer).


5. Add the cabbage to the wok, along with a good pinch of black pepper (if you like it).  Don't be tempted to stir it yet, give it about 2-3 minutes to just sit and wilt a bit in the steam of the pan.


6. Now stir the whole vegetable mix together and cook until the cabbage is completely cooked through.  You will need to keep watching this, as it can stick to the wok if you're not careful.

7. Take the potatoes from the oven and divide between two plates.  If any are particularly big, chop them into smaller pieces.  If you want to, add a little butter for flavour.


8.  Pile on your vegetables from the wok, add your bacon and HP sauce (if using) and enjoy!

Saturday 6 July 2019

Light Strawberry Tart


My husband's favourite dessert is a strawberry tart, but it's a rare treat for him as it's such a sugary thing.  This version uses lots of cheats, but is a little healthier at least!

Ingredients

1 pack ready-rolled Light Puff Pastry
400g Strawberries
4 x 160g tubs Muller Light Banana and Custard yoghurt
1 sachet Powdered Gelatine
2 tbsp Low Sugar Strawberry Jam
Low Fat Spread for greasing

Method

1.  If your pastry has been in the fridge, remove it from the box and let it come to room temperature for about 30 minutes.  (If the pastry is too cold, it's really hard to unroll.)

2.  Preheat the oven to 200-220ºC.

3.  Line a baking sheet with greaseproof baking paper.  Rub a little low fat spread over this, just to be sure your tart won't stick.


4.  Unroll the pastry sheet onto the baking paper.  Score a 1-2cm border all the way round with a knife (being careful not to cut through).  Use a fork to pierce the central area (ideally, we don't want this to rise).


5.  Place the pastry in the oven and bake for 15-20 minutes until the edge is puffed up.  Remove from the oven and allow to cool.  (Don't worry if it has puffed in the centre, just press it down with a fork.)

6.  While the pastry is cooling, cut the tops off the strawberries and halve them.


7.  Put all the yoghurt in a bowl.  In a mug, stir up the gelatine powder with a few tablespoons of boiling water.  The idea is to get the powder dissolved in as little water as you can.  Stir the gelatine into the yoghurt until combined.  Then pour the yoghurt mixture over the baked pastry case.

8.  Place the strawberry halves gently onto the tart.  Place in the fridge until the yoghurt has set (a few hours).


9.  To get a nice shine on the tart, we cheat!  Place 2 tablespoons of low sugar strawberry jam in a mug, and microwave for 30-60 seconds until it is runny.  Brush this over the strawberries on the tart and return to the fridge.  When serving, I find a pizza cutter the best tool to use to portion it.