Friday 19 May 2023

Salt and Pepper Chips

1.    Our air fryer doesn't need pre-heating, but if yours does, pre-heat it to 200°C for a few minutes. If you're using an oven instead, preheat it to 220°C.2.    Peel the potatoes and cut into chips.  Place them in a bowl of cold water, ideally for at least 30 minutes.  This helps wash the starch off them, which makes them crispier in the end.3.    Drain the water off the potatoes, and place them on a clean teatowel.  Dab them to dry off any excess water - try to get them as dry as possible.4.    Put the potatoes in a dry bowl, add the plain flour and 1 tsp of the sunflower oil, then toss them to get them coated.  Again, the flour is there to help with the crispiness.  I use an oil sprayer to keep the amount of oil to a minimum.5.    Put your potatoes in the air fryer at 200°C for 10 minutes (or put on a baking tray in your pre-heated oven for the same time).  Shake or stir them after 5 minutes - this helps them brown more evenly.6.    While the chips are cooking, slice your peppers, onions and spring onions into thin strips.  Add to a bowl with 1 tsp of sunflower oil, 1 tsp of salt, 1 tsp of garlic granules and 1 tsp of chilli powder and toss them to coat.7.    Once the chips have had their 10 minutes, add the sliced vegetables and give them a good shake to combine.  Cook at the same temperature for a further 15 minutes, shaking or stirring them every 5 minutes to make sure they cook evenly.8.    Serve your chips, sprinkle with salt, and splash on some soy sauce.  Yum!

Monday 18 January 2021

'No added sugar' Cookies


I've been making these biscuits for a while, to allow my husband to still have a sweet treat, even though he is diabetic.  Before anyone gets all up in arms about natural sugars being in the raisins etc, these don't spike his blood sugars the way real biscuits do, which is kinda the point...  Also, they're optional!

These are super-easy to make and taste delicious, if slightly cakey.

Ingredients


240g Plain Flour
120g Soft Butter
40g Granulated Sweetener
2 tsp Baking Powder
2 Eggs
Raisins or Chopped Nuts or both (optional)

Method

1    Turn on the oven and heat to 180℃.

2    Put the flour, baking powder and sweetener in a bowl.  Add the butter in small chunks, and the eggs.


3    Gently stir the ingredients together until they just start to form a dough.

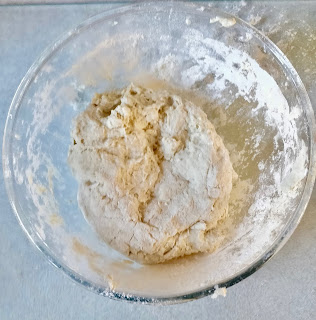
4    Now, get in with your hands and form a dough ball.  It should be quite a dry mix.  If you find it's too wet, add a little flour.  If it's too dry, add a splash of milk.

5    If you are adding raisins or nuts, add these now and knead these into your dough until they are well distributed in the dough (but only just - don't work the dough too much).


6    Sprinkle some flour on the work surface, then roll out your dough to be about 0.5cm thick.  It needs to be thin, as it will puff up slightly when baked. (The picture here is about a third of the dough).


7    Use a cookie cutter (or a glass or a mug) to cut out your cookies.  I find this mix usually creates about 30-35 cookies - but it will depend on the size you use.


8    Bake in the oven for about 15-20 minutes until they brown slightly.  See if you can keep your hands off them until they cool down. (We can't!)


Monday 3 August 2020

Pineapple Ice Cream


Pineapple Ice Cream

I adapted this recipe from one I found in a book, which reliably informs me that this is in fact Sherbet, not Ice Cream.  Did you care?  I thought not!

Ingredients

Pineapple Ice Cream Ingredients


200g sugar (you can use 20-30g of granulated sweetener instead, but it makes the ice cream a little grainy in texture)
4 pineapple rings from a can, plus 4-5 tbsp of the juice/syrup
2 large or 3 small egg whites
150ml double cream

Method

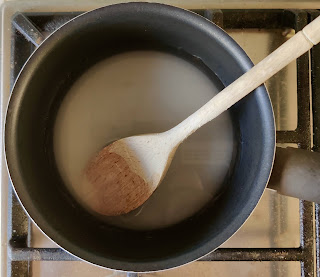
1    Place the sugar in a pan with 240ml water and heat gently until the sugar dissolves.  Bring to the boil, then simmer for about 15 minutes to get a sugar syrup.  Allow the syrup to cool for about 30 minutes.

Sugar Syrup

2    Blend the pineapple rings and juice to make a pineapple puree.  I used a stick blender, but use a food processor or blender if that's what you have.

Pineapple rings

Pineapple puree

3    Whisk the egg whites until they are white and frothy (but still liquid - we're not making meringues here!)

Whisked egg whites

4    Combine the pineapple puree, cold sugar syrup and egg whites, then finally stir in the double cream.

Ice cream mixture

5    Pour the mixture into an ice cream maker and churn as per the manufacturer's instructions.  When done, you can store this in the freezer for up to a month.

Alternatively, pour your mixture into a freezer box and freeze for 3-4 hours.  If you are doing it this way, make sure you stir the ice cream well every half hour or so, to stop ice crystals forming in your ice cream.

Enjoy!


Wednesday 29 July 2020

Sausage and Egg Muffin


Let's start by saying this isn't really a recipe, more of a tip or review!  I really like the breakfast menu at McDonalds, and in particular, the Sausage and Egg McMuffin.  But can I justify £2.19 for what is essentially a snack?  I've been experimenting for a while now, and have finally come up with my own version that tastes better and is much cheaper (about 65-90p).  Mainly, it's been about finding the best tasting ingredients.  By the way, I do my main shop at Tesco, but I promise I have tried products from all over the place - it's just a coincidence that the Tesco products win for me!

Sausage
It's surprisingly hard to find these.  I tried Lorne Sausage (the flat square sausage from Scotland).  I tried taking the meat from a normal sausage and squishing it into a hamburger shape, and also adapting the sausage meat in various ways.  There was also a sausage patty that Iceland sells - which I didn't rate at all, very fatty yet still somewhat tasteless.  All of these were OK, but didn't taste exactly how I would like.  The winner here is Tesco frozen Pork and Herb Sausage Patties (£2.30 for 6) which are delicious.

(A special shout out to my own Vegetable Roll here too, it is absolutely delicious in a muffin, but not the same as the Maccy-Ds :-) )


Muffin
Almost all English Muffins you can buy taste pretty much the same.  However, for this 'recipe', it is really important to (a) toast them and (b) butter them.  I have found two in particular that are fab - Warburtons (80p for 4) is the cheapest 'good' one I found.  But the very best muffin for me is Tesco Finest Cheese and Black Pepper English Muffins (£1.30 for 4) - the extra flavour is worth the extra cost!


Cheese
I know people will hate me for this, but 'real' cheese just isn't right on this!  You can bleat on about it all you like, but you need the more plasticky cheese single for this!  The very best ones are from Dairylea, but there is so little difference I usually use the cheapest ones, like Creamfields Singles at the bargain price of 50p for 10.


Egg
I've done lots of experiments with eggs for muffins!  The closest to the real thing is to buy an egg ring and use it to fry the egg in a frying pan.  A good alternative for me was to crack the egg into a ramekin and bake it in the oven.  But here's the controversial bit - I don't like the egg in the McDonald's version.  McDonalds *do* have an egg that I like, more of an omelette, but they only use it in their breakfast wraps and bagels.  So I crack my eggs into a shallow tapas dish, beat them up, and microwave them for 1-2 minutes.  Omelette-y goodness is a massive improvement!

Ketchup
Only one ketchup exists - Heinz.  Discussion over.

Saturday 28 September 2019

Ulster Fry


OK, so firstly, this picture does not do justice to the delight that is the Ulster Fry.  I mean I've done some processing on the photo, but unfortunately, I took my eye off the ball when cooking this, and there's no getting away from it, almost everything on the plate is overdone.  But this blog is meant to be about the real world, and in the real world this happens sometimes...  and it was still absolutely delicious!

Also, today's blog is more of a serving suggestion than a recipe... but I wanted to bring a few of my recipes together into one meal.  Forget about calories with this one, it's a huge portion, filling treat of a weekend breakfast.

Finally, there will be many Northern Irish folk fainting at the prospect of beans on an Ulster Fry.  No, they're not traditionally part of it.  But I like them, so I say PFFT!

Ingredients (per person)

2 slices Bacon
2 slices Vegetable Roll
1/2 Soda Bread Farl
1 Potato Cake
1 Egg
100-200g Baked Beans
Brown Sauce or Ketchup (optional)

Method

Honestly, the method is simply cook everything and bung it on a plate!  But if you'd like a bit more detail...

1.  Start cooking the bacon and vegetable roll.  You can either do this by frying in a pan with a little oil, grilling, or oven baking in a hot oven.

2. When there's about 5 minutes to go on your meat, pop your beans in a saucepan and heat on a medium heat until hot.  (Or place in a microwave dish and zap in the microwave for a couple of minutes).

3.  At the same time, heat up a little oil in a frying pan and crack an egg into it.  Add the soda bread and potato cake and cook for a minute or two on each side until they're how you like them,  (You can also do the bread and potato cake by sticking them in a toaster, but that just isn't quite as nice as they come out a bit dry - although you can butter them afterwards to help with that.)

4.  Once everything is cooked, bung them on a plate, add ketchup or brown sauce to taste and get it down your neck :-)

Saturday 21 September 2019

Soda Bread Farls


I really used to miss Soda Bread, another staple Northern Irish food.  Soda bread is available in most English supermarkets, but it's always the brown/wholemeal sort, and not the delicious bread of my childhood.  Soda farls (farl refers to the shape of the bread) were briefly available in my local supermarket, but were discontinued, so I was at a loss - until I found out how incredibly quick and easy they are to make!  And it can be made in advance in batches, as it freezes really well.

Soda bread is delicious when it's cut through the middle and grilled or toasted - buttered and topped with bacon and brown sauce, or sausage and a fried egg... or my personal favourite, corned beef and melted cheddar (I can hear the discomfort of Ulster folk as I write that, but I love it!).  It's also a vital ingredient to be fried up in an Ulster Fry.

Ingredients

300g Plain Flour
1 tsp Salt
2 tsp Bicarbonate of Soda
250ml Milk
2 tsp Lemon Juice

Method

1. Stir the lemon juice into the milk, and leave to sit for about 10 minutes.  This allows the milk to curdle slightly, forming a buttermilk.  (You may just use buttermilk instead, but my local shops don't seem to have it).


2. Mix together the flour, salt and bicarbonate of soda in a bowl.


3. Make a hole in the middle of the flour mixture and add the milk mixture.


4.  Get in with your hands and mix the ingredients to form a fairly dry dough.  If your dough is sticky, add some more flour a spoon at a time.  If it becomes too dry (and starts cracking), add a splash of milk.


5. Sprinkle some flour on your work surface and turn out the dough.  Shape it into a circle about 1cm thick.  This is thinner than you expect, but remember your dough is going to puff up a bit when cooked.  Cut your circle into quarters with a knife.


6.  Heat a frying pan to a low to medium heat.  Sprinkle some flour in to the pan (the pan needs to be totally dry), then place your farls on top.  Now LEAVE IT ALONE for around 8-10 minutes until the underside is nicely coloured.


7.  Turn the farls over and cook for another 8-10 minutes on the other side.  Remove from the heat and allow the farls to cool completely before either freezing them or cooking with them.

Saturday 27 July 2019

Mexican Bean Stew


Another one of those recipes that seems too simple to put on Grubbed Up! since it's so quick and has some cheats, and it's just a staple midweek meal for us (and there's usually some leftovers for a work lunch the next day).  But I've also served this a few times to friends, and they always want to know how it was done.  It's also one of those dishes that can be served in lots of different ways... It's delicious by itself, but also fantastic when served with either rice or Fried Cauliflower Rice.  It works well on a baked potato.  If you can afford the carbs, my favourite way to have it is in wraps with some southern fried chicken goujons, sprinkled with a little grated cheese.

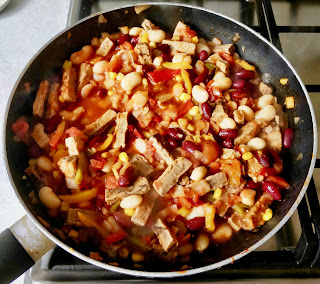
In the picture, I've chosen to add Quorn vegetarian steak strips to the stew.  A lot of people seem to hate Quorn, and I think that's mainly because they've had it badly cooked and ended up with a dry, chewy disappointment.  For me, Quorn only works if you cook it in a sauce, as it's when it soaks up flavours from your cooking liquid that it becomes super tasty.  Try it!  (Or if you really can't bring yourself to use Quorn, add some cooked chicken pieces instead).

Ingredients

250g chopped onions
250g sliced peppers
150g sweetcorn
400g can butter beans
400g can kidney beans
400g can chopped tomatoes
100g tomato puree
1x35g pack fajita seasoning (I use Old El Paso Smoky Barbecue)
Optional ingredients:
1 tbsp sunflower oil
300g pack Quorn chicken style pieces/vegetarian steak strips or 300g cooked chicken pieces

Method

1. Heat the sunflower oil (if using) in a wok or pan on a high heat.  Add the onions, peppers and sweetcorn (I use frozen vegetables for convenience).


2. Cook the vegetables until the onions and peppers are soft and cooked through.


3. Add the beans, tomatoes and tomato puree.  Sprinkle over the fajita seasoning and stir through.  Keep heating this until the sauce starts to bubble, then reduce the heat to a low simmer.


4.  If you are using Quorn or cooked Chicken, add it now.  You can cook these from frozen if required.

5.  Simmer the stew for 10-15 minutes and serve. (If you used frozen Quorn/Chicken, make sure it is fully heated through).  Don't overcook the stew, as the beans may start to break down and mush a bit.

Saturday 20 July 2019

Fried Cauliflower Rice

I was never convinced by the idea of cauliflower 'rice'.  And to be honest, when I first tried it, it was rank, tasteless mush, and a poor replacement for real rice.  But I persevered with it because I was trying to reduce carbs in my diet, and this was an easy alternative. This is my way of improving it, making it something I wanted to eat!  I use frozen peas, sweetcorn and onions for convenience, but you can use pretty much any vegetable you like - mushrooms, peppers, leeks, spring onions - anything you can chop finely.  You can use this in place of any savoury rice dish, like with a curry or chilli.  Or, I like to add some chopped cooked ham, bacon or chicken and have it as a meal in its own right.

Ingredients

1 whole large cauliflower, broken down into florets
100g peas
100g sweetcorn
100g chopped onions
3 tbsp soy sauce
1 tbps sunflower oil (you can make this without oil if you like)
1-2 eggs (optional)
Pinch of black pepper

Method

1. Either grate the raw cauliflower, or pulse the florets in a food processor until it is in small, rice-like pieces.

2. In a wok or frying pan, heat up the sunflower oil (if using) on a high heat.  Add the onions, peas and sweetcorn and cook for around 5 minutes until the onions are soft, stirring occasionally.

3. Add the cauliflower and black pepper to the pan, then pour over the soy sauce and stir until the soy sauce has coloured all the cauliflower evenly (it will be a light brown colour), and the vegetables are evenly spread.

4.  Cook for a further 5-10 minutes, stirring frequently, until the cauliflower is cooked.  Don't cook for too long or the cauliflower will go a bit mushy, which while it tastes OK, isn't the texture of fried rice that we're looking for.

5.  If you are using eggs, beat them first, then drizzle over the 'rice' just before the end of cooking.  Stir the egg through quickly, and they should form tiny pieces of cooked omelette, similar in size to sweetcorn kernels.  The eggs only take a very short time to cook in these small chunks - no more than a minute.

Saturday 13 July 2019

Cabbage and Bacon (or Beans)


I hesitated to even put this on Grubbed Up! because it's just too simple, and honestly, it doesn't look like it's anything special.  But then I realised that it's too delicious not to share, and it's a big portion, filling meal for two that's not too unhealthy!  It's funny, because as a child, you couldn't have paid me to eat cabbage, but now it's one of my favourite vegetables.  Using pre-prepared and frozen vegetables makes this an easy midweek dinner.  And don't be snobby about frozen or canned vegetables, they still count for your 5 a day!

If you want to make this vegetarian, it's also delicious using a can of butter beans instead of the bacon.

Ingredients
600g Baby New Potatoes (or you could use a large can of potatoes)
300g Chopped Onions (I use frozen onions, because of my laziness!)
300g Sweetcorn
8-10 rashers of bacon
Oil for frying.
Black Pepper (optional)
Butter or Low Fat Spread (optional)
HP Brown Sauce (optional)
300g Chopped Cabbage - Tesco do a pack of prepared cabbage and leek that I love for this!


Method

1. Pre-heat the oven to 180ºC.  Place the potatoes on a baking tray and stab each one with a fork.  Cook in the oven for 1 hour.


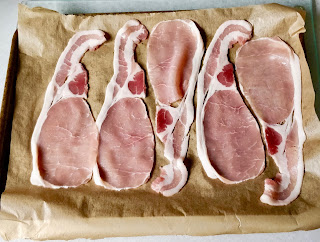
2. Turn the oven up to 220ºC.  Place the bacon on a baking tray and put into the oven with the potatoes.  Depending on how you like your bacon, it will take around 10-20 minutes to cook.  (I like the bacon snappable - but most of you will think that's massively overdone!).  Make sure you turn it over halfway through cooking or it will stick to the tray.


3. While the bacon is cooking, place a wok or pan on a high heat and get it nice and hot (You really need very little oil).  Add the onions and cook for 5 minutes until they are soft.


4. Add the sweetcorn to the wok and cook for a 2-3 more minutes. (Frozen sweetcorn takes a minute or two longer).


5. Add the cabbage to the wok, along with a good pinch of black pepper (if you like it).  Don't be tempted to stir it yet, give it about 2-3 minutes to just sit and wilt a bit in the steam of the pan.


6. Now stir the whole vegetable mix together and cook until the cabbage is completely cooked through.  You will need to keep watching this, as it can stick to the wok if you're not careful.

7. Take the potatoes from the oven and divide between two plates.  If any are particularly big, chop them into smaller pieces.  If you want to, add a little butter for flavour.


8.  Pile on your vegetables from the wok, add your bacon and HP sauce (if using) and enjoy!

Saturday 6 July 2019

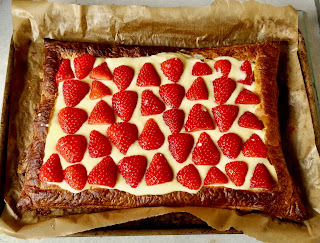
Light Strawberry Tart


My husband's favourite dessert is a strawberry tart, but it's a rare treat for him as it's such a sugary thing.  This version uses lots of cheats, but is a little healthier at least!

Ingredients

1 pack ready-rolled Light Puff Pastry
400g Strawberries
4 x 160g tubs Muller Light Banana and Custard yoghurt
1 sachet Powdered Gelatine
2 tbsp Low Sugar Strawberry Jam
Low Fat Spread for greasing

Method

1.  If your pastry has been in the fridge, remove it from the box and let it come to room temperature for about 30 minutes.  (If the pastry is too cold, it's really hard to unroll.)

2.  Preheat the oven to 200-220ºC.

3.  Line a baking sheet with greaseproof baking paper.  Rub a little low fat spread over this, just to be sure your tart won't stick.


4.  Unroll the pastry sheet onto the baking paper.  Score a 1-2cm border all the way round with a knife (being careful not to cut through).  Use a fork to pierce the central area (ideally, we don't want this to rise).


5.  Place the pastry in the oven and bake for 15-20 minutes until the edge is puffed up.  Remove from the oven and allow to cool.  (Don't worry if it has puffed in the centre, just press it down with a fork.)

6.  While the pastry is cooling, cut the tops off the strawberries and halve them.


7.  Put all the yoghurt in a bowl.  In a mug, stir up the gelatine powder with a few tablespoons of boiling water.  The idea is to get the powder dissolved in as little water as you can.  Stir the gelatine into the yoghurt until combined.  Then pour the yoghurt mixture over the baked pastry case.

8.  Place the strawberry halves gently onto the tart.  Place in the fridge until the yoghurt has set (a few hours).


9.  To get a nice shine on the tart, we cheat!  Place 2 tablespoons of low sugar strawberry jam in a mug, and microwave for 30-60 seconds until it is runny.  Brush this over the strawberries on the tart and return to the fridge.  When serving, I find a pizza cutter the best tool to use to portion it.


Saturday 29 June 2019

Sugar Free Custard / Ice Cream

I'm often looking for ways to make things without sugar, as my husband is a diabetic.  Custard has always been a bit tricky, but with some experimenting, I've come up with something that works.  I wouldn't call it healthy, but it's certainly less sugary than normal custard, which was the objective!

Ingredients

400g can Coconut Milk
300ml Double Cream
5 eggs
10g Sweetener - this is optional, and the more sweetener you use, the more grainy the texture of your  custard/ice cream will be
1 tsp Vanilla Essence

Method

1.  Place the coconut milk and cream into a saucepan and heat gently.  Keep stirring until you see bubbles just starting to form at the edge of the pan.  Remove from the heat.


2.  Separate the eggs, keeping the yolks.


3.  Whisk the egg yolks until they go slightly pale.


4.  Add the egg yolks a spoonful at a time to the saucepan, making sure to stir in each spoonful until fully combined before adding the next.  (If you do this too quickly, you'll end up with sweet scrambled eggs!) . Keep going until all the egg yolks are combined - it takes a few minutes to do this.

5.  Put the pan back on the heat and heat gently, stirring all the time.  It seems to take forever, but eventually the custard will thicken.  If you're just after custard, pour it over your favourite dessert straight away... I love this just poured over sliced bananas!

6.  If you're making ice cream (or just like cold custard), pour the custard into a bowl and chill in the fridge until cold.  (To stop the custard getting a skin, put some cling film over the surface).


7.  Use an ice cream machine to turn the custard into ice cream.  Alternatively, pour the custard into a suitable dish and put in the freezer.  If you're doing it this way, take the mixture out every half hour or so and give it a good stir - this breaks up any ice crystals that form while freezing.

Saturday 15 June 2019

Fast French Onion Soup for Cheats!


Firstly - this is not the way to make french onion soup.  Seriously, it takes ages to make french onion soup properly to get that amazing onion flavour - some people say it takes 2-3 days to do right! But this cheat version can be ready in about 40 minutes, and for me it gives me enough of the essence of the real thing to satisfy.  Turn your nose up at my cheats if you like, but I love it!

Ingredients

2 tbsp oil (I use sunflower oil)
50g butter
1kg sliced onions (I use a big bag of frozen onions)
1 tbsp sugar
2-3 cloves garlic, thinly sliced (or use 3-4 tsp of powdered garlic)
1 tbsp plain flour
8-12 beef stock cubes (depends on how beefy you like it)

Method

1. Melt the butter in the saucepan and add the oil.

2. Add the onions and fry them until they go soft (about 10 minutes on a medium high heat).


3.  Add in 1 tbsp of sugar and continue to fry with the lid on until the onions start to go brown - but don't let them burn.  (If you started with frozen onions, you may want to keep the lid off as a lot more water needs to come out.) . It takes around 20-30 minutes for this, be patient.

4.  Add the garlic and flour and cook for 5 minutes more.  The flour sometimes makes the onions go a bit gloopy, if that happens add a little water to loosen them up.

5. Add 1.5 litres of boiling water from the kettle, and 8 stock cubes to the pan.  I hate crumbling oxo cubes and the way it makes my fingers feel gritty, so I have a technique... If you fold back the foil flaps carefully, and gently squeeze the cubes, you can crush them still in the packaging, so you don't have to get them all over your hands.

If you like it beefier, add some more stock cubes to taste.

6. Simmer for a few more minutes, then serve.  The classic way is to serve in a bowl and add a slice of toasted baguette with some melted cheese on top.  I sometimes just crumble a bit of cheese straight in and have some chunky bread for dipping.